How to Use Cat Eye Gel Polish
How to Use Cat Eye Gel Polish
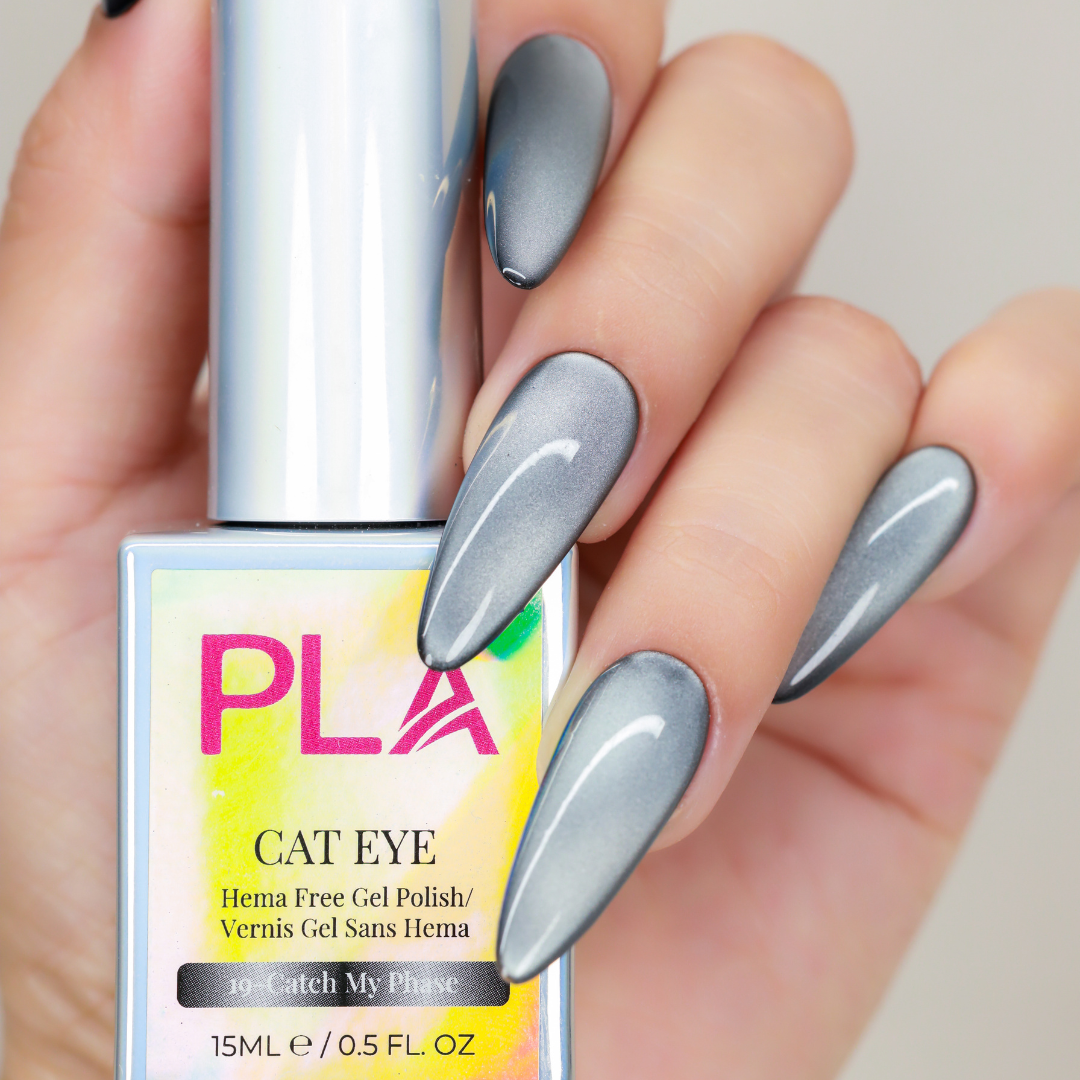
Cat eye gel polish has taken the beauty industry by storm, creating a stunning, dimensional effect that shifts with light — resembling the shimmer of a cat’s eye… hence the name. If you have ever seen the velvety stripe of reflective or holographic pigment or color running through a nail, that is the cat eye effect. And yes, it’s as mesmerizing as it sounds.
If you’re new to magnetic gels, we’re here to answer how to apply cat eye gel polish! Keep reading if you want to know how to use cat eye gel polish.
What is Cat Eye Gel Nail Polish?
Cat eye gel polish is a magnetic professional nail polish that is infused with tiny metallic particles that respond to a magnet, allowing you to manipulate the metallic particles and create a multi-dimensional look that shifts with movement. With the magnet, you can create lines, waves and different multidimensional finishes.
Why You Need Our Cat Eye Gel Polish in Your Rotation
If you offer intricate nail art, our cat eye gel polish belongs in your kit. If you don’t already offer magnetic designs, it’s time to start. Our cat eye gel polish is packed with everything nail artists love: smooth application, intense color payoff, and magnetic pigment that moves how you want it to.
Here’s what sets ours apart:
-
It’s 10-free, HEMA-free and TPO-free
-
The bottles are GORGEOUS
Easy to Work With, Even for Beginners
If you’re a beginner and learning how to use cat eye gel polish, PLA’s cat eye polish glides on smoothly and gives you the perfect design, with room to correct before curing.
No need to rush, just clean, controlled application.
Long-Lasting Results Your Salon Can Be Proud Of
Whether you’re a solo nail artist or work in a salon, if you know how to use cat eye gel nail polish, with proper prep and curing our formula holds strong for 2-3 weeks of wear. It resists chipping, dulling, and fading.
Professional-Grade Pigment & Magnetic Pull
Our polish is packed with high-shine, responsive particles that move cleanly under a magnet. With three collections to choose from: classic cat eye, dual cat eye and pearl cat eye, we have professional grade pigment perfect for your nail kit. Regardless of which collection you choose, the finish is bold, reflective and always high-impact.
Works With All Nail Types and Styles
Whether you’re working with gel overlays, hard gel, acrylic, or soft gel extensions, PLA’s Cat Eye Gel Polish is fully compatible. Use it as an accent nail, full set, matte, or glossy.
Unique Colors You Won’t Find Anywhere Else
Our cat eye shades are anything but basic. Expect color shifts, depth, and reflective effects that you just don’t get from standard nail polish collections.
-
Big Mood Rising - our classic cat eye collection with 18 different shades.
-
Lunar Eclipse - our dual cat eye collection with different colored magnetic pigments to create an extra level of dimension. Best used over black gel polish.
-
Moonstone Magic - our pearl cat eye collection, with slightly larger magnetic pigments to create an ethereal pearl cat eye effect.
How to Use Cat Eye Gel Polish: Step-by-Step Guide
Now that we’ve covered the basics of cat eye gel polish, it’s time for us to get into how to use cat eye gel polish.
If you’re a beginner just learning how to use cat eye gel nail polish or an experienced nail technician trying to perfect your cat eye game, keep reading. We’re going to discuss everything there is to know about how to apply cat eye gel polish.
Start With a Solid Nail Prep
Learning how to apply cat eye gel polish starts with what any nail service starts with — proper prep.
As with any gel manicure, proper prep is key.
-
Shape and gently buff the nail
-
Push back cuticles
-
Wipe with a lint-free wipe and alcohol to remove any dirt, debris or oils
-
Dehydrate the nail
-
Apply a base coat & cure
Apply Your Base Color (Optional But Recommended)
There’s more than one way to approach how to apply cat eye gel polish, but for some polishes offer the best results by applying a black base color. Often, applying a black base color gives the best color pay off and intensifies the dual cat eye effect, but it is optional.
In fact, you may even get a completely different color when it is applied over black vs. when it is not, so we recommend experimenting with both! For PLA cat eye gel polishes, our Lunar Eclipse Collection looks best when applied over a black base.
Apply the First Layer of Cat Eye Gel Polish
The next step is really simple — applying the first layer of cat eye gel polish.
Apply a thin, even coat of your cat eye polish. It is very important that you do not cure it yet.
Knowing how to apply cat eye gel polish is important, but the next most important step is learning how to manipulate the particles with the magnet.
Use a Magnetic Wand to Create the Cat Eye Effect
This is the most important step to learn, and the hardest to master when learning how to use cat eye gel polish.
Hover the magnetic wand just above the nail (and not touching) for 5-10 seconds. You will start seeing the magnetic particles shift. They are drawn upward, rising to the surface toward where the magnet is placed and concentrating where the magnet is the strongest. As they shift, they create the dimensional shimmer you see in cat eye nails. They can form a line, curve, or ripple, depending on your motion and magnet style.
If you are a beginner learning how to use cat eye nail polish, we recommend starting with simple lines and curves before getting into intricate designs. After mastering simple lines and curves, experiment with angles for different looks.
PLAProTip: Get familiar with your magnet – PLA’s magnetic wand has 3 different magnets, one to pull the magnetic particles, one to push the magnetic particles, and one to pull them into a straight line.
Cure and Layer as Needed
Once you are happy with your design, cure under a UV or LED lamp. From there, you can leave it as-is or build on it with a second layer for added depth or a more opaque finish.
Layering cat eye gel polish can give two different effects depending on how you approach it.
-
Reapplying cat eye polish and using the magnet again can create a multi-dimensional design, where light and shimmer seem to shift in layers.
-
Because the magnetic particles are being pulled up in certain areas, this process will reveal a “base” color underneath, which will give the design its signature contrast and depth. So, if you want more pigment in the base color, we recommend painting the first coat, pulling the magnetic particles away to reveal only base color, then painting another layer of cat eye and using the magnet on the second layer.
Seal With Top Coat
Finish with a gel top coat to lock in shine, protect the design, and get them to last longer. Cure one final time and wipe if needed, depending on the top coat formula.
Common Mistakes We See Artists Make When Applying Cat Eye Gel Polish
Learning how to use cat eye gel nail polish definitely comes with a learning curve. It takes a lot of trial and error, and it may take a few times before you are a pro at it!
Let’s go over common mistakes people make when learning how to apply cat eye gel polish, so hopefully you don’t make the same mistakes or you know what to do if you do come across this problem!
Curing Before Using the Magnet
One of the most common mistakes we see when nail technicians are learning how to use cat eye nail polish is curing the gel polish before using the magnet.
This locks the magnetic shimmer in place before you’ve even had the chance to create a cat eye effect. Once the polish is cured, the particles can no longer shift or move, so you’ll end up with just a glittery nail, which isn’t a bad thing.
Always remember: the magnetic wand must be used while the polish is still wet and uncured. Take your time adjusting the design before curing it under the lamp.
Using a Weak or Misaligned Magnet
When learning how to apply cat eye gel polish, the strength of the magnet makes a huge difference in the final look. A weak magnet may not have enough strength to gather the shimmer particles, which will result in an undefined design.
On the other hand, holding the magnet at the wrong angle or too far away can cause the effect to blur, shift off center, or even disappear altogether.
For best results, use a high quality wand and hold it a few millimeters above (or below) the nail surface.
Applying Gel Too Thick
As with any gel polish, applying cat eye polish on too thick can result in smudging, curing issues, or bubbling.
Applying gel polish on too thick can cause only the top layer to cure, while the bottom layer is still wet, so once the polish is touched, it can cause bubbling or a ripple effect. It can also cause the top layer of polish to peel off, revealing uncured polish under. Uncured polish can lead to risks as far as allergic reactions, so you want to make sure you are applying thin, even layers.
Wrapping Up Our Guide on How to Apply Cat Eye Gel Polish
Working with cat eye gel polish comes with a learning curve, just as learning how to apply lacquer nail polish, gel polish, or nail art does.
The good news is that practice makes perfect, and cat eye gives you some room to play around before curing.
PLA Cat Eye gel polish comes in 54 stunning colors and is HEMA-free, TPO-free and 10-free. That’s why PLA is your #1 source for professional nail supplies — with everything from 4 in 1 nail polish, to nail tools, and more!


